TCS Personal Certificates
For more information on personal certificates and why signing electronic mail, see a brief summary in the article on E-mail and Electronic Signature.
Obtaining a Certificate
Characteristics:
- Validity period of the certificate: 3 years
- Type of certificate: RSA 2048
- Trusted root CA: USERTrust RSA Certification Authority
- for users of organisation integrated into eduID.cz (Czech Academic Identity Federation)
Request:
- Verification of User Identity. Come to the Help desk in room 22 Sb and tell the staff that you want to verify your identity for electronic signature. Bring your student (ISIC) or employee card and one form of ID (ID card, driving licence or passport).
- Issuing of Certificate. Submit your application via the CESNET web form (https://tcs.cesnet.cz/clientrequestform/form, Personal Certificate):
- Login with school account (via Shibboleth),
- Select the email addresses to be placed in the certificate,
- enter a secure password (passphrase) and a file with the private key and certificate will be downloaded, the file is usually called usercert.p12
- We strongly recommend backing up the private key (the file downloaded from the browser with the private key and certificate), including storing the password in a password manager.
- Installation of Certificate. It is advisable to install certificates on all devices on which you handle mail.
Detailed instructions with the appearance of the screens when issuing the certificate – the instructions are generic for all schools, so there is no step of visiting the Helpdesk of the Informatics Centre.
Revocation:
When another certificate is issued, the user’s previous personal certificate is automatically revoked.
If your computer has been compromised (stolen laptop, virus attack, cracker attack …) or lost media where you have the private key backup, follow the Certificate Revocation instructions – revoke the old certificate and have a new one issued.
If necessary, you can contact scs@vse.cz with your request.
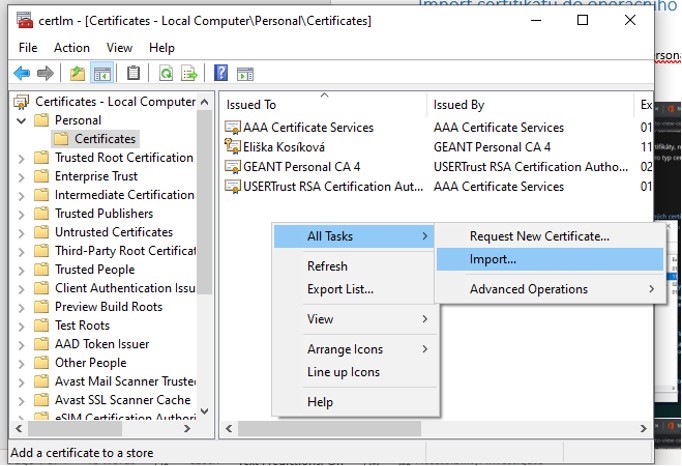
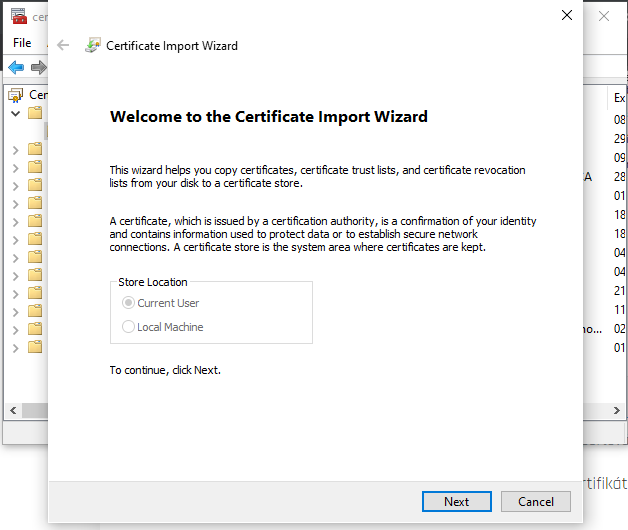
Import of Personal Certificate into system
Search for certmgr (Certificate Manager) → in the Personal section, right-click choose All Tasks → Import. Another option is to right-click on the certificate file (e.g. from backup medium) and Install PFX. Both options will start installation wizard. Follow the instructions to finish installation.
Imported certificate can be easily used when logging into a VPN.
Microsoft Outlook
Microsoft Outlook – Personal Certificate Settings
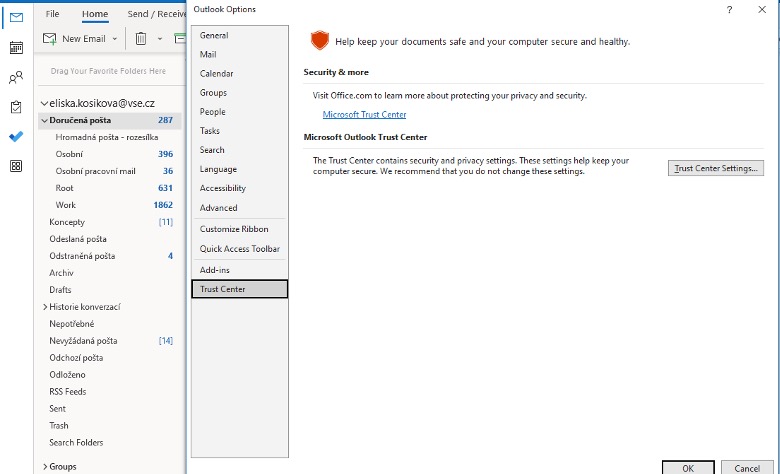
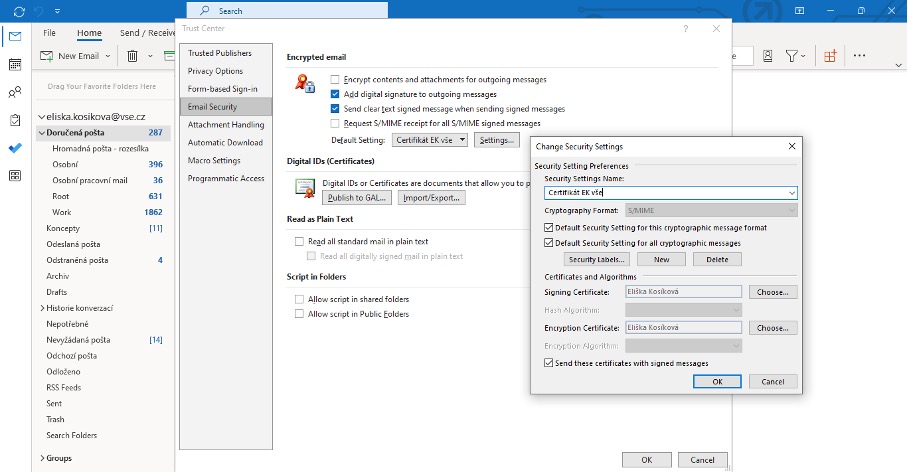
Select File → Options → Trust Centre → Trust Centre Settings → Email Security, we check that “Add Digital Signature to Outgoing Messages” is selected and also “Send clear text signed message when sending signed messages” . Then we create a new/adjust current security setting and then select it as the default setting.
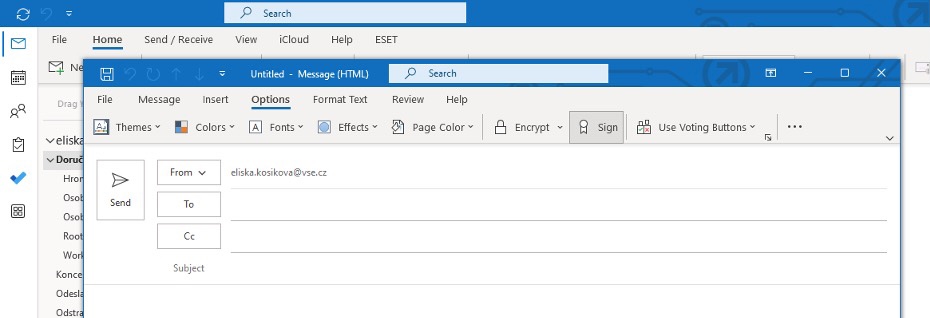
Microsoft Outlook – Sending Signed Message
When sending a message, the colored button informs you that the message will be signed.
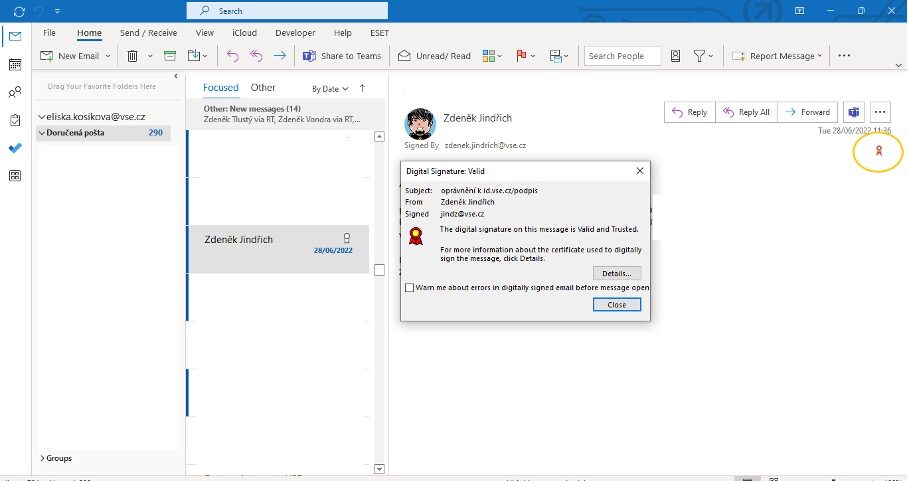
Microsoft Outlook – Message with Valid Signature
The icon in the inbox indicates that the message is signed. The right icon in the Inbox detail indicates that the signature is valid. After clicking this right icon a window with more information about the signature validity with a button for displaying the signature validity evaluation details will pop up.
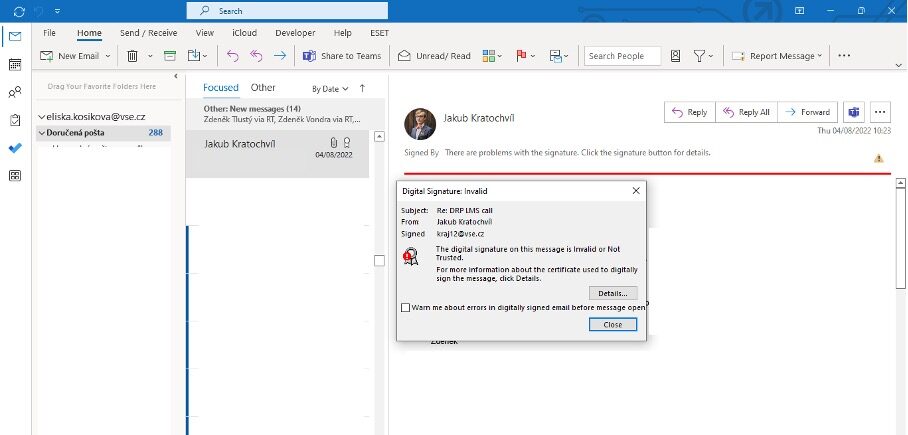
Microsoft Outlook – Message with Invalid Signature
The icon in the inbox indicates that the message is signed. After clicking on the icon or message in the details of the delivered message, a window with more information about signature verification problems and a button for displaying the signature validity evaluation will pop up. After selecting “Signed” , it shows that the message has been changed – the signature is then invalid.
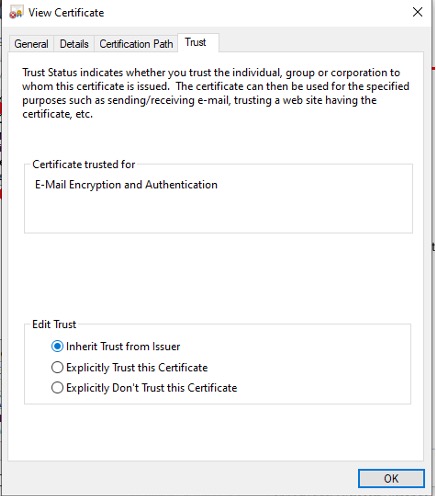
Microsoft Outlook – Unknown Signature and Granting Trust
The icon in the inbox indicates that the message is signed. After clicking on the icon or message in the details of the delivered message, a window with more information about signature verification problems and a button for displaying the signature validity evaluation will pop up. After selecting “Signed” it shows that the root certificate is not trusted – the signature cannot be then validated. By clicking on the button it is possible to display the root certificate details. After examining it, the certificate can be awarded “Trusted” by clicking the button.
Microsoft Outlook – Sending Encrypted Message
How to obtain recipient’s certificate?
In order to send an encrypted email, we need to obtain the recipient’s certificate. As soon as he sends us a digitally signed message, we add him to our contacts (automatically with his certificate) and we are ready to send him an encrypted email. The message we send will be encrypted with his public key (known from the stored certificate) and he can decrypt it using his private key.
Microsoft Outlook – iOS
iOS – Installing Certificate
Open the password-protected certificate file in the application on your mobile phone (to import the file into your phone, you can send an email with an encrypted .pfx file). After entering the password, the installation will take place.

Imported certificate can be easily used when logging into a VPN. Click on “share” (you need to have Client installed) and choose AnyConnect.
iOS – Certificate Settings
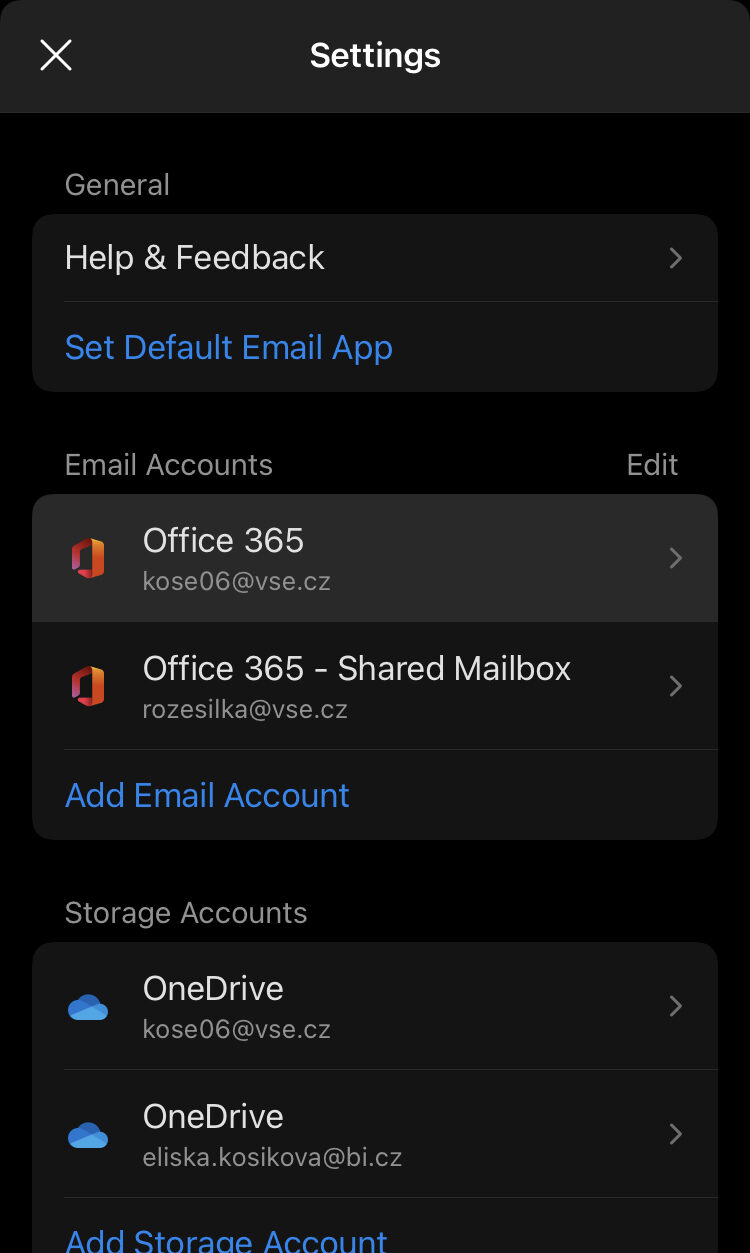
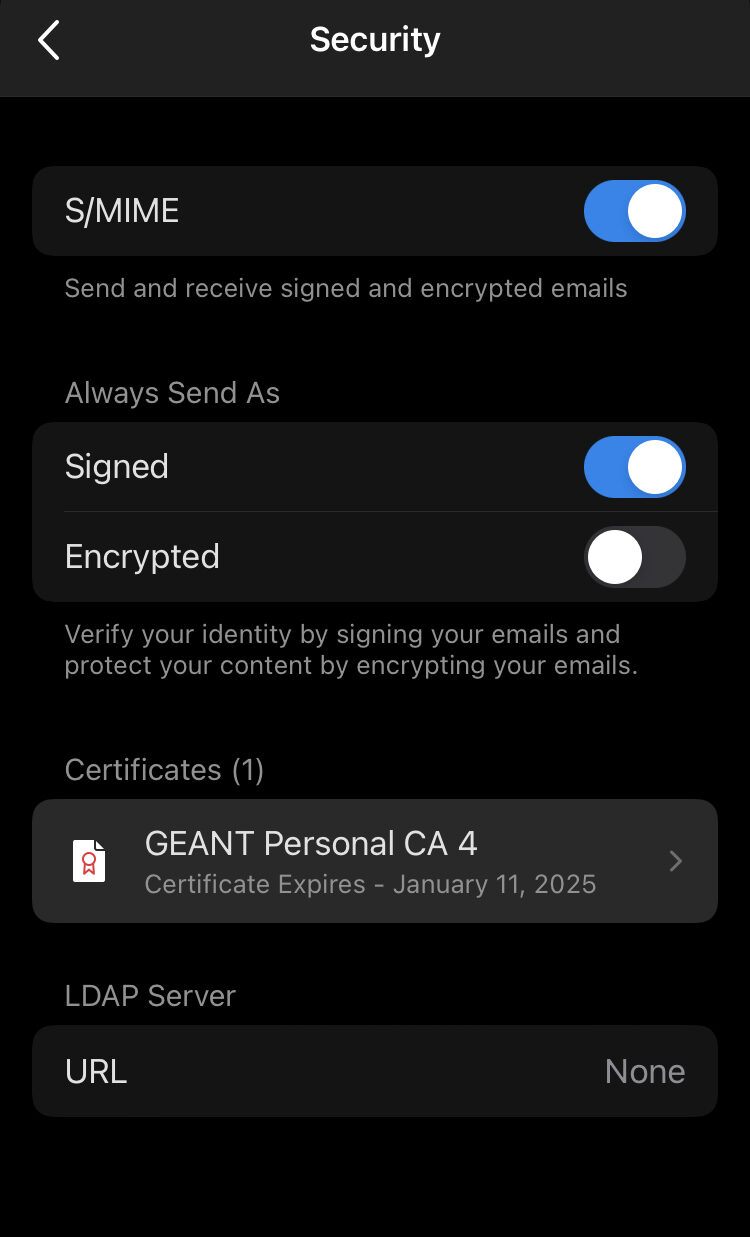
In Settings → Select your account (Office 356). In the security section, you can further manage the basic settings of the certificate (turning on S/MIME signing/encryption).

iOS – Sending Encrypted Message
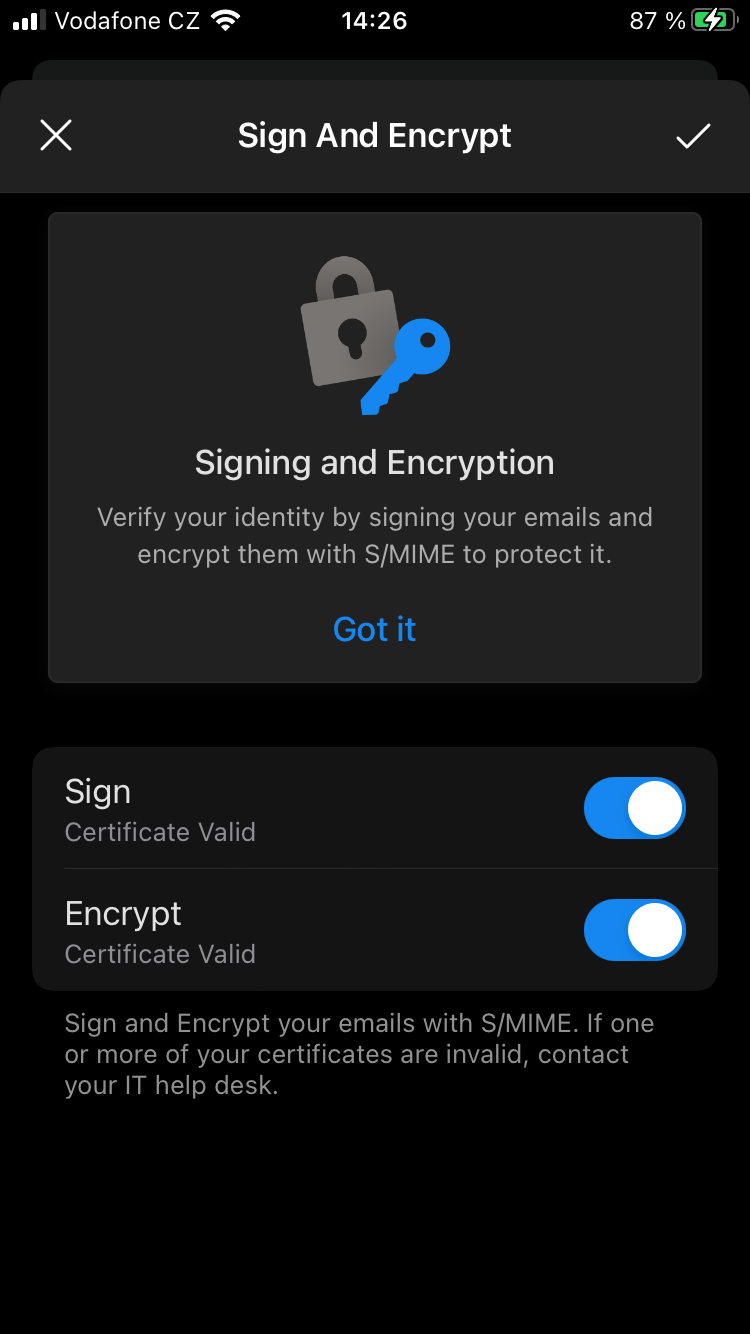
When sending a new email that you want to encrypt, select 3 dots in the bottom bar → sign and encrypt.


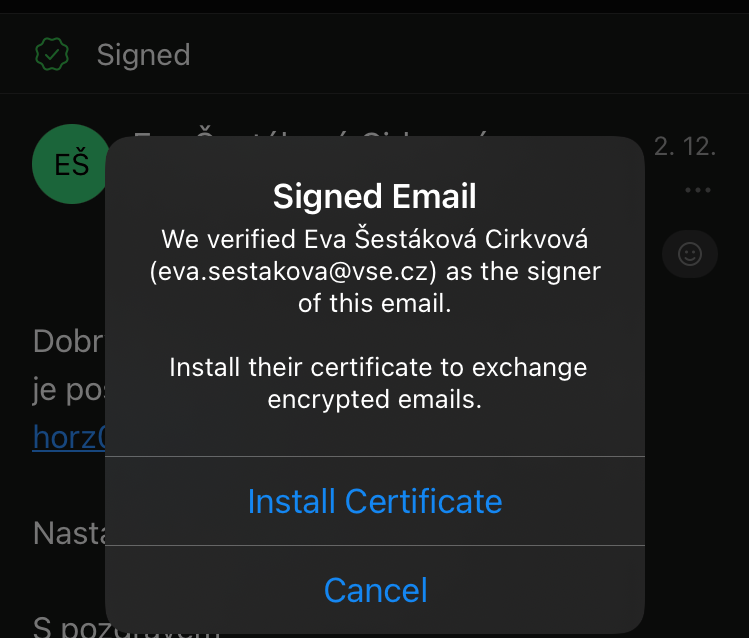
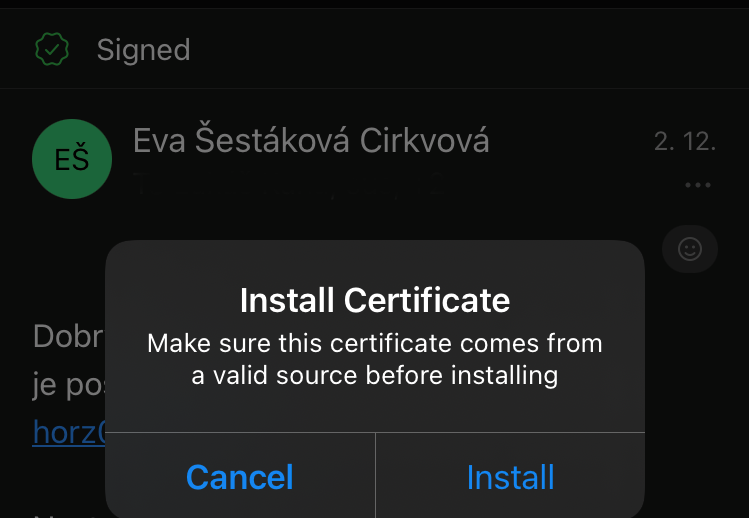
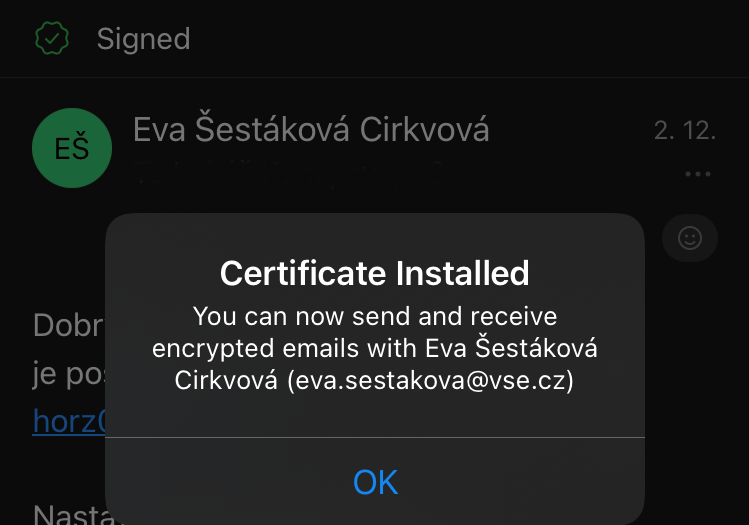
How to obtain recipient’s certificate?
In order to send an encrypted email, similar to the method in the Desktop Outlook App mentioned above, we must have the recipient’s certificate installed. As soon as he sends us a signed email, we click on the green sign (that shows email was signed) and Install Certificate. Now we know his public key, with which it encrypts the message and the recipient then decrypts it with his private key.
Mozilla Thunderbird
Mozilla Thunderbird – Import of Personal Certificate
To import a personal certificate in the application, select Main menu: Preferences → Account Settings → Security (1) → View Certificates (2) → Personal (3) → Import (4) and enter the path to the backup of the personal certificate.
Mozilla Thunderbird – Personal Certificate Association
To associate a personal certificate with a mail account in the application, select Main menu: Preferences → Account settings → Security → Select Signature Certificate (1). In the drop-down menu (2) select the imported certificate and check the option to Sign Messages Electronically (3).
Mozilla Thunderbird – Sending Signed Message
When sending a message, the icon (1) indicates that the message will be signed. Click on it (1) or on the Security button (2) to display a detailed summary (3).
Mozilla Thunderbird – Message with Valid Signature
An inbox message with a valid signature is indicated by an icon (1), and after clicking on it, signature verification details will be shown (2). By clicking the View Certificate button (3), it is possible to display the signer’s certificate (4), including its trustworthiness.
Mozilla Thunderbird – Message with Invalid Signature
An inbox message with an invalid signature is indicated by icon (1), and by clicking on it, signature verification details (2), in this case reporting a message integrity violation, will be shown. By clicking the View Certificate button (3), it is possible to display the signer’s certificate (4), including its trustworthiness.
Mozilla Thunderbird – Message with Unknown Signature
An inbox message with unknown signature validity is indicated by an icon (1), and by clicking on it, signature verification details (2), in this case indicating that the root certificate has not yet been trusted, will be shown.
By clicking the View Certificate button (3), it is possible to display the signer’s certificate (4). The certificate issuer description (5) reveals which root certificate is needed.
Mozilla Thunderbird – Granting Trust to Root Certificate
The root certificate can be obtained from the website of the certification authority. To grant trust to the root certificate in the application, select Main Menu: Preferences → Advanced (1) → Certificates (2) → Certificates (3) → Authorities (4) → Import (5) and enter the path to the downloaded certificate.
Acrobat Reader – Signing Documents
In the top bar choose Tools → Certificates → Digitally sign. Mark the field in which the signature will be inserted and select the personal certificate with which you want to sign the document.
Acrobat Reader – Timestamp
We can also insert a time stamp into the document. Choose Tools → Certificates → Timestamp. The first time we use it, a dialog box will pop up. Enter the url of a time server (for example, the free TSA service from Cesnet, FreeTSA or another free TSA server) and name. Multiple servers can be set up and default one selected.
For further use, we can change the settings in Edit → Preferences. In the Signatures section, Document Timestamping → More.
Tools → Certificates → Timestamp and save the file with timestamp.