Applying Rules to Inbox Messages
- Types of Rules
- Automatic Replies (Out of Office)
- Mail Forwarding
- Blocking or Unblocking
- Inbox Rules
- More Information
1. Types of Rules [menu]
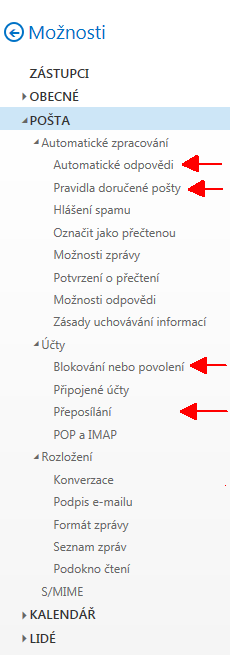
The user can create rules that affect the processing of incoming emails (see the menu from the web interface in the picture on the right): 
- Automatic Replies – when you receive an email, the sender of that email will automatically be notified that “you will respond within a certain time…” Of course, you can set the response text.
- Mail Forwarding – forward all incoming mail elsewhere, you can keep a copy in Office 365.
- Blocking or Unblocking – you can create a list of blocked senders (their email always end up in the Junk E-mail folder) as well as a list of safe recipients (their emails never go to Junk E-mail folder)
- Inbox Rules – a comprehensive tool where you can influence mail processing based on various attributes. Examples of applying rules:
-
- forwarding only specific incoming mail to another email address,
- automatic mail sorting into folders,
- selected letters are automatically assigned a category, importance or retention policy,
- “coloring” emails – for example, emails from a manager you want to have in green color,
- to reply to selected emails using a preset template,
Automatic replies, mail forwarding or sender blocking are essentially specialized Rules Wizard.
2. Automatic Replies (Out of Office) [menu]
You can create an auto-reply message when you do not read your mail for a long time. A distinction is made between school senders (from school Office 365) and external senders. You can set a specific time to start sending the automatic replies and a specific time to stop sending them. An automatic reply is sent only once. For senders outside of school, you can disable the sending of automatic replies or set different text for them.
- Out of Office message exceptions: Don’t Reply to Everyone – you want to choose who will receive automatic replies. In this case, you cannot use the Rules Wizard for automatic reply, but you must create the rules by yourself.
3. Mail Forwarding [menu]
Use this option to forward all incoming mail (including spam) to another mailbox – either another person’s mailbox or yours that you have outside your school network. If you specify a target email address, you can choose whether a copy of the messages is also stored in your Office 365 mailbox. The server does not check whether the target mailbox is working or if by chance it is not full.
How to Set Up Mail Forwarding in the Office 365 Web Interface
4. Blocking or Unblocking [menu]
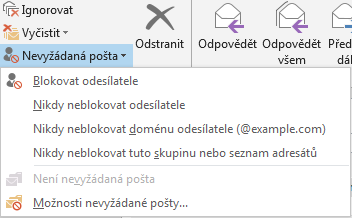
 This option is associated with a spam check – you can define safe senders and recipients whose mail will never be included in the Junk E-mail folder. You can also add senders to blocked senders whose mail server always puts in the Junk E-mail folder. These lists are always evaluated on the server, the lists are managed via the web interface or using Outlook. In Outlook, you can also set blocking based on the country of origin or the encoding used, such as emails written in Chinese.
- How to configure Outlook Junk Mail Filter to Stop Spam Email – detailed description of Outlook list management including explanatory pictures.
The list of blocked senders is not very effective in combating spam, as spammers often change the sender’s email addresses. Emails from mailing and distribution lists should not be blocked, it is better to unsubscribe.
It is a good idea to use safe sender and recipient lists if some emails that you do not consider spam end up in your Junk E-mail folder.
Email headers fields are checked against the lists.
5. Inbox Rules [menu]
Inbox Rules are a powerful tool for different types of incoming mail processing. The previous three cases are specific cases of application of these rules with special support for easy setup by users.
Use of rules is governed by the following principles:
- It depends on the order of the rules – in the first rule, you can move clear spam to the Junk E-mail folder, in the second rule you can forward the remaining emails to another mailing address.
- All rules are saved to the server, i.e. when you create a rule in Outlook on your home computer, you will see it in Outlook at school or in the web interface.
- Most rules are executed on the server at them moment of arrival of a new email. However, it is also possible to create rules that run only in full Outlook – i.e. they are executed when Outlook downloads new emails to your computer. You are notified of this when you create a rule. Examples are rules with audio playback, marking a message as read, printing a message.
- Enabled rules will automatically apply only upon saving new emails to your Inbox folder. They will only be used after checking for SPAM. When running manually in Outlook, it is possible to apply the rule to already saved emails in a particular folder.
- You can also create rules for outgoing messages.
- Each rule consists of three parts:
-
- setting conditions – which emails are affected by the rule,
- selection of actions – what actions will be made in these emails,
- setting exceptions – exceptions for conditions from point one,
6. More Information [menu]
Instructions for specific situations:
- Undo Send for Outlook – How to Delay Sending by Seconds or Minutes in Outlook. In the meantime, you can cancel the sending of the email. Sample Rules for Outgoing Messages.
- Creating Rules with NOT Conditions – How to Create a Rule of “all messages that do not…”
- Managing Large Amount of Message Rules – How to Manage Tens or Hundreds of Rules,