Change-Profile-Photo
You can use a photo from an ID card (from InSIS) or almost any of your own photos as a profile photo in Microsoft Office 365.
- Synchronization of the Photo from InSIS
- Setting/change of the Photo in Office 365
- Removing the Profile Photo
1. Synchronization of the Photo from InSIS [menu]
Each user with an ID card has a photo in InSIS. By default, photos are not published to Office 365; the user must set their publication by themselves.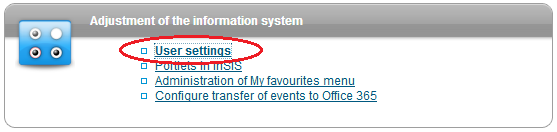
After logging in to Personal Administration, select User Settings in the section of Adjustment of the Information System.
If you confirm the Yes option in the section of Accept Transfer to Office 365, your photo will be set as
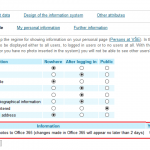
profile in Office 365.
2. Setting/change of the Photo in Office 365 [menu]
You can use any photo; Office 365 has no photo size limit. If necessary, it adjusts the photo (reduces or enlarge
s, changes the resolution). It is best to have a photo size of 648 × 648, 24-bit color depth, JPEG format and size up to 250KB.
| The profile photo is designed to help other users differentiate your email and messages from other users’ information. Use a photo of you to identify yourself, or avatar with which others can easily identify you. If you do not have such photos/pictures, it is better to leave the initial letters or use the photo from InSIS. |
After logging in to Office 365, click the last icon on the top navigation bar (if you did not set a photo, it contain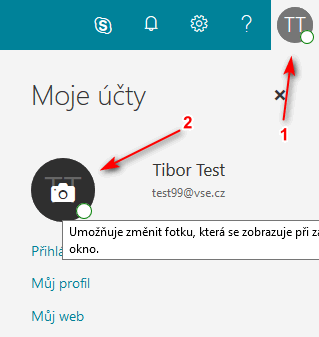 s the first letters of your name). And then click on the photo/icon. Now another window will open in which you will upload a file with your photo.
3. Removing the Profile Photo [menu]
I found some instructions for removing a profile photo (e.g. How do I remove a picture from my Office 365 profile?), but in July 2018, none of them worked. If you want to remove the photo, send the request to the Office 365 administrators at sls@vse.cz, who will then remove it using Remove-UserPhoto.